
Mailchimp has been around for 18 years now and is loved by people of the internet. It has grown from a simple solution for small businesses to a multi-million revenue generation company, and it owes its success to the passion of its people and the amazing benefits it gives its customers.

So, if you’ve just recently signed up with Mailchimp, or are considering giving it a test drive. This guide is for you:
We’re going to show you how to create your first Mailchimp email template, and along the way, you’ll learn how easy it is to make such campaigns, and all the benefits you can reap from Mailchimp.
Let’s get started!
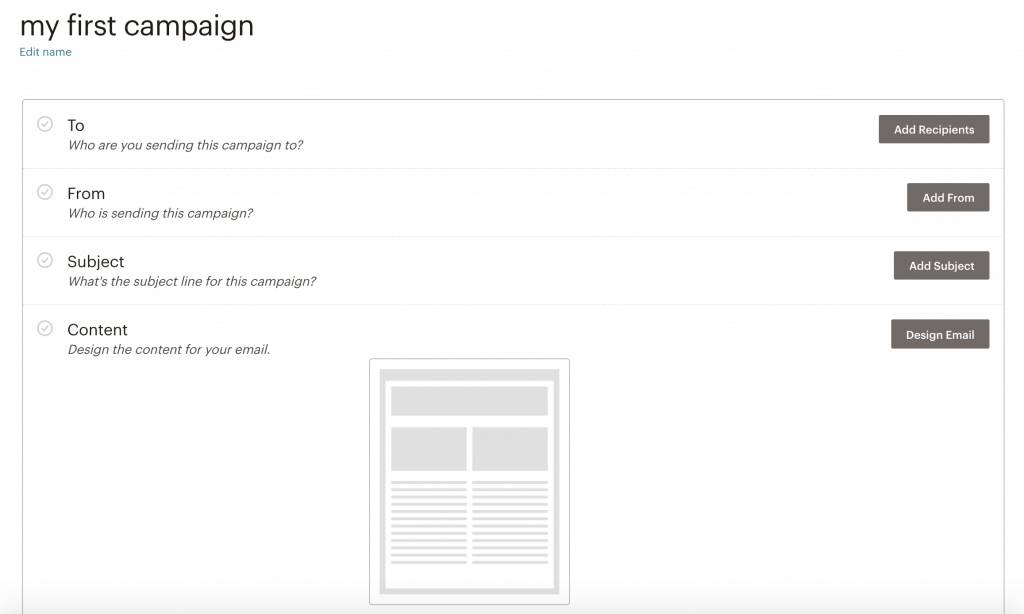
After you’ve created your Mailchimp account and have added subscribers, you’ll click on ‘campaigns’ in the top left corner of your Mailchimp dashboard.

Then you’ll proceed to click on ‘Create Campaign and choose ‘Email’ as an option.

Here you get the option to name your email and even decide what sort of html email template you want to create. You can choose between a regular email, an automated message or a plain text email.
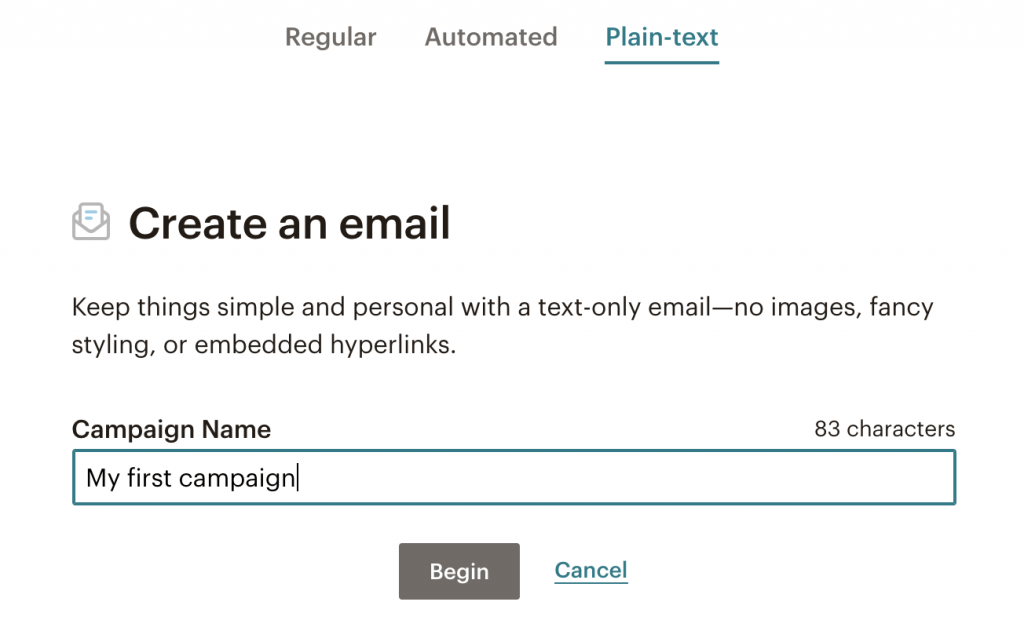
You can use regular emails to keep customers informed and send them the latest news or product updates. Automated emails come in real handy when you want to increase customer engagement rates. With automated emails, you can welcome new subscribers, send thank you messages when they make transactions and send a birthday wish too. Plain text emails are recommended when you want to send simple, personal messages to your recipients.
After you click on begin, you’re directed to an email builder which helps you build your campaign, step-by-step.
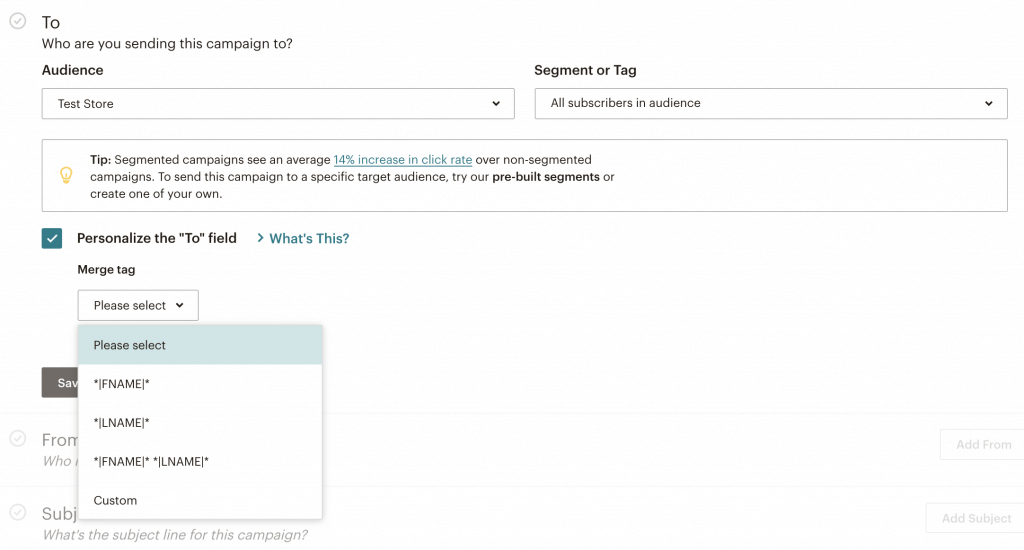
If you start chronologically, you’ll choose your audience first. These will be your subscribers you’ve added to your Mailchimp account. Mailchimp gives you the flexibility of choosing groups of people from different stores and/or from different audience segments. You can even add a personalization field to your email by opting in for options such as displaying your contact’s name when they receive your email. Studies have shown that the more you personalize your emails, the better your chances of engaging readers.
Step 2: Choose your email and your subject line
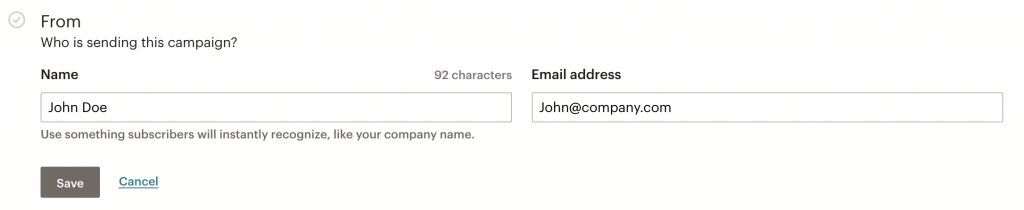
The next step involves choosing the sender name and email you want your recipients to see.
After that, you’ll decide on your subject line.
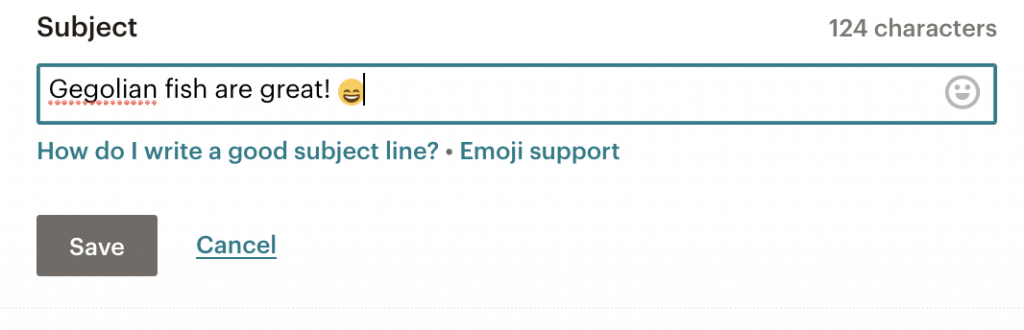
Subject line is a key part in designing an effective email campaign. A reader takes just a few moments to decide whether they want to open your email based on the subject line. So make sure you create one that:
- Grabs attention
- Arouses curiosity
- Offers something irresistible
When designing your subject line copy, keep these elements in mind and you’ll increase your chances of high open rates.
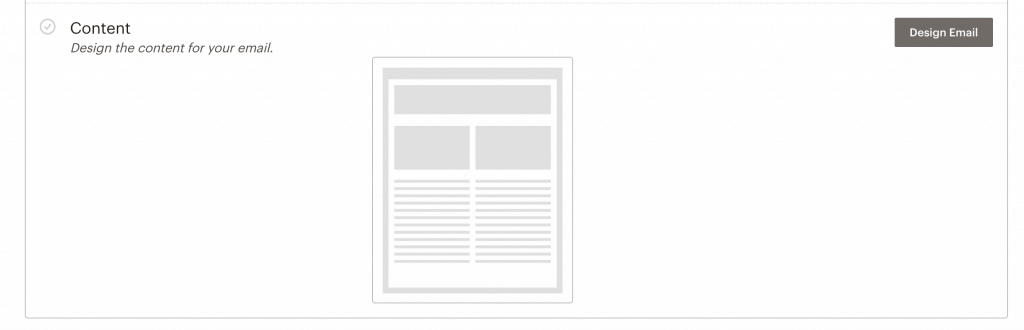
Step 3: Design the actual content for your email
This is where the real fun or work lies.
Click on ‘Design Email’ button to be directed to the next page.
You can choose to design content in multiple of ways.

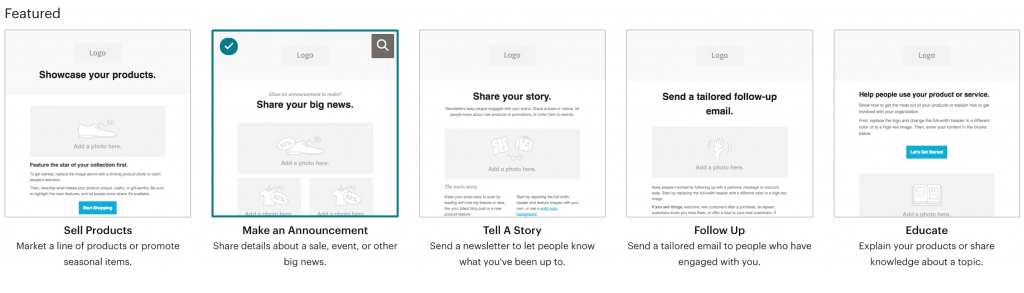
You can click on the ‘Layouts’ tab where you’ll select a template for your email. Mailchimp lets you choose email templates according to the purpose (sell products, make announcements, educate, etc.) or by format (1 column, 1:2 column, simple text, etc.)
You can also filter templates by theme to match an exact purpose or event for your email.
The last 3 tabs are more of convenience and customization options where you can pull-up previous emails to create new ones or code a completely new email from scratch.
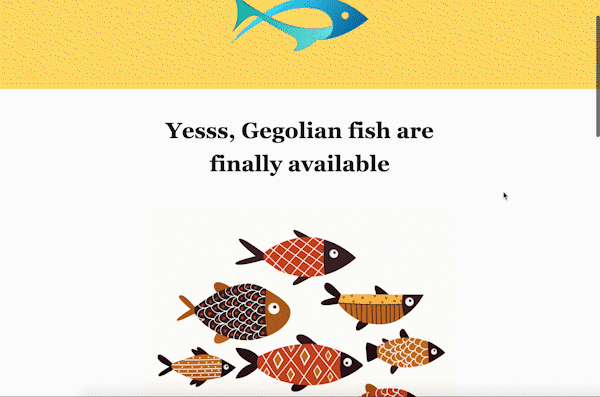
For this example, we’ll use the ‘Make an Announcement’ layout as our template.
Once selected, you’ll be taken to Mailchimp’s email builder.
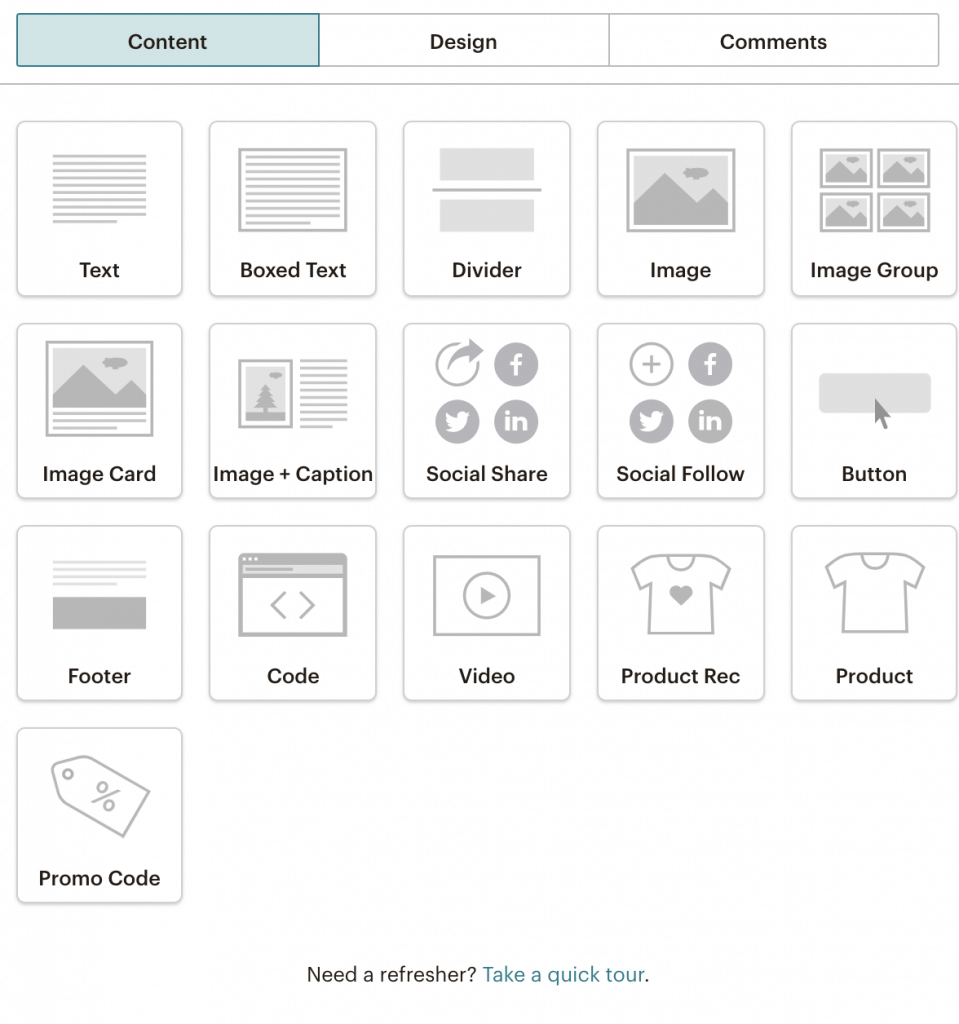
The builder can look confusing and intimidating at first sight as it comes loaded with features and options. But once you play around with the options, you’ll come to see the wide variety of options as a blessing that allow you to design your custom email template to the dot.
The builder also outlines what each section is about, so you can add your media assets as easily as possible.
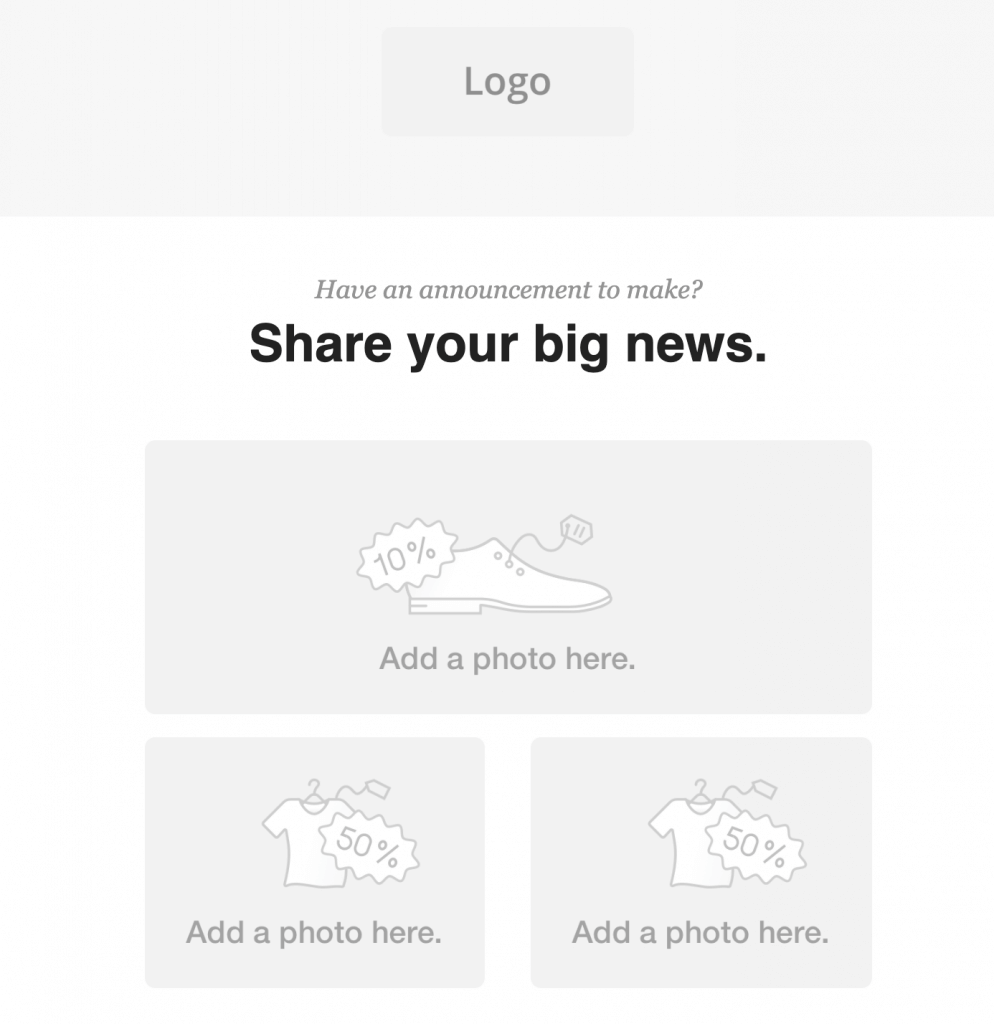
You can see in the screenshot above how Mailchimp’s email builder guides you where to place logos, photos, texts, etc.
To start off, we’ll add a logo for our make-believe online fish market.
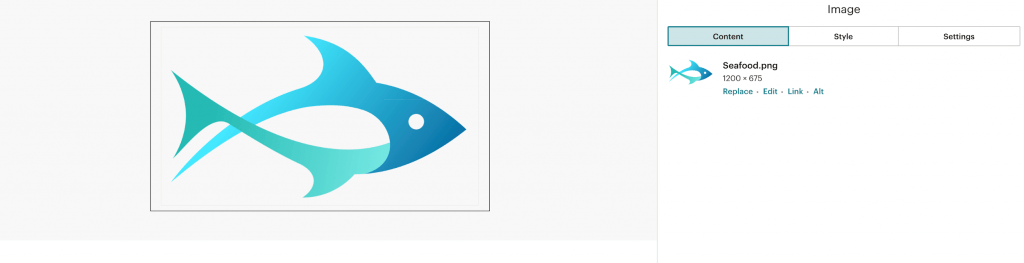
Mailchimp allows you to crop, resize, add borders, add links and alter alignment for your logo.
Mailchimp also gives you an array of other elements you can add to your emails. The options are listed in the right panel.
So, using all these tools and Mailchimp’s guided assistance, here’s the email we came up with:
Once you’re happy with the design and content of your Mailchimp email campaign, you can send a test email to yourself to check if everything is in order, and according to your preference.
Step 4: Setup social sharing and tracking
Now before you send out your first campaign, Mailchimp allows you to take care of social sharing and email tracking.

So, if you connect your social accounts with Mailchimp, every time you send a campaign, you can choose to get it published as a post on these channels to increase your reach.
The next and final step is to set-up email tracking.
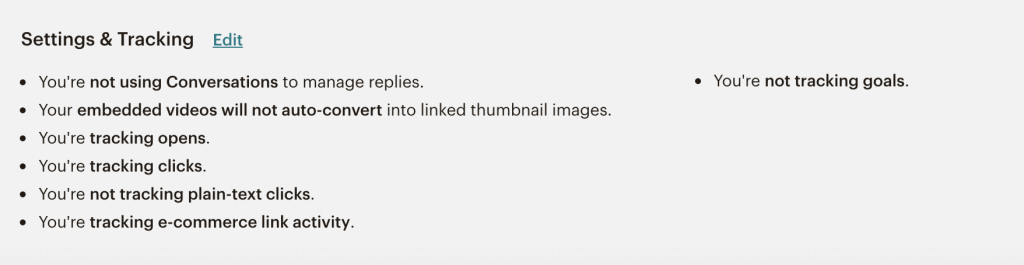
Tracking is an important part of any marketing process as you need to measure the success of your email campaigns, and also understand what worked and what needs to be changed in future efforts.
Mailchimp’s settings and tracking allow you to filter replies, make embedded videos friendly, and track open and click rates. What’s more is you can “track visitors to your website from your Mailchimp campaigns, capture order information, and pass that information back to Mailchimp. Then, you can view purchase details, conversions, and total sales on the reports page.” as per Mailchimp’s own description.
You have further options in the form of syncing your tracking with Google Analytics and ClickTale link tracking to integrate your data to create a complete picture of your marketing efforts.
Step 5: Send out your first email!
Now that you’ve created subject lines, added content, set up tracking and tweaked all your settings, it’s time to press the ‘Send’ button.

If you’re still not sure about any part of your campaign, you can click on finish later, and all your changes will be saved for the future.
If your audience lives in a different time zone, you can schedule it for a later time too. The choice is yours.
Mailchimp is really powerful email marketing tool and once you’ve played around with it a little bit, it also becomes really easy to use. With all these features and the value, Mailchimp’s power lies in its pricing. You get a sweet deal for the amount you pay to them. you can also design your Mailchimp newsletters with help of this article.
We hope this article will help you in designing your first email campaign with Mailchimp. Let us know how it goes for you in the comments below. We would love to hear from you!
Kevin George
Latest posts by Kevin George (see all)
Webinar Emails: What You Need to Know?
Designing Email for Visually Impaired Subscribers